Those who are familiar with my series should know that my primary interest is in wide-field sky surveys. To complete an all-sky survey, the best tool is a lens. After all, the aperture is larger than that of a telescope, the focal length is shorter, and it is much faster to shoot. For various reasons, I only recently started trying to shoot with a lens, and tried some astrophotography in addition to sky surveys. After talking with some experienced astrophotographers, I discovered several significant differences in the habits of deep space photography and "regular" star astrophotography (which means using a lens and a DSLR, instead of a telescope and an astro-camera, to capture wide field photos such as the milky way. We will refer this as "astrophotography" in the following text). These differences are not particularly complex things, do not require spending a lot of money, but I believe that doing them will greatly improve the final image. Of course, these techniques are not secrets, many star photographers have been using them for a long time. I am not an expert in astrophotography, I am just sharing some deep space shooting tips here, maybe they will be useful.
Stretching
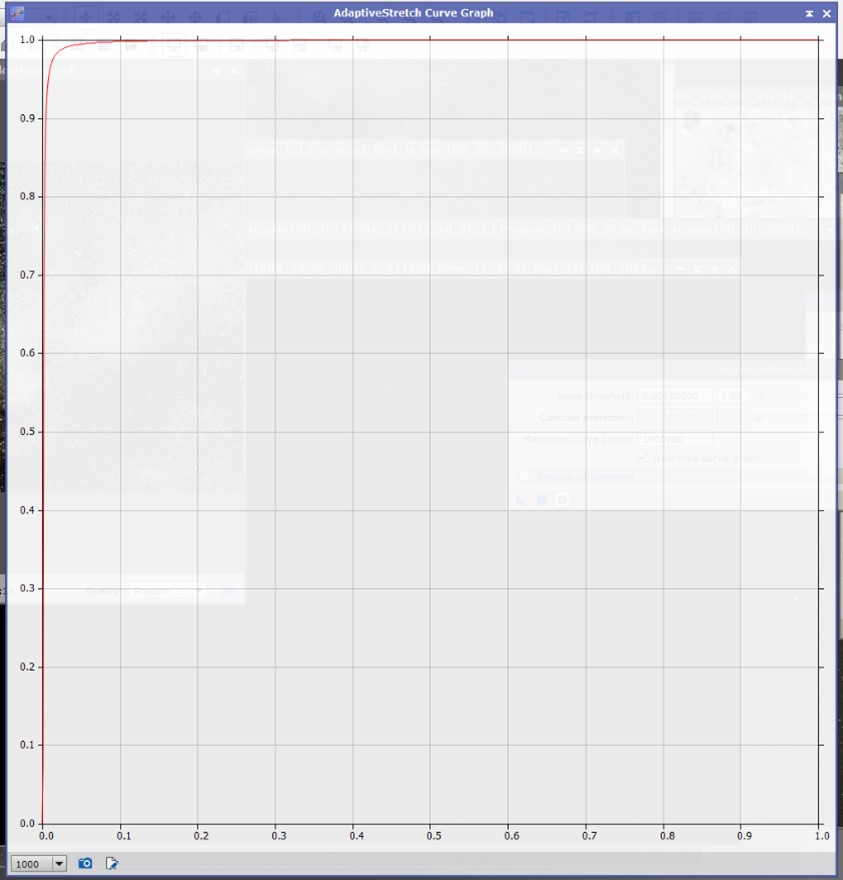
One of the most emphasized points in deep space photography is controllable stretching. This is mainly because the objects we shoot are too dark, so we need an exaggerated stretching curve to see them clearly. Astrophotography is the same. For example, the stretching curve of a galaxy shot with a Canon R5 can be seen below. We basically stretched the 0-0.02 part to between 0-0.95. This kind of stretching curve is difficult to draw in software such as Photoshop (PS). Even if we barely draw it with multiple curve layers, it is difficult to finely control it. However, PixInsight (PI) and other astronomical software have various automated or semi-automated stretching algorithms that can help us fine-tune such stretching curves to get very good results. Another problem is that the internal processing format of PS is integers, and after multiple stretches, there will be a large cumulative error. PI is a decimal, so its precision is much higher. Therefore, I found that many photos that were difficult to adjust in PS, with curves that could not be stretched well, looked very good when using an automatic stretching function in PI.
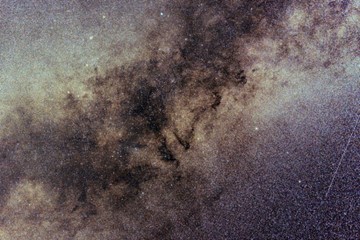
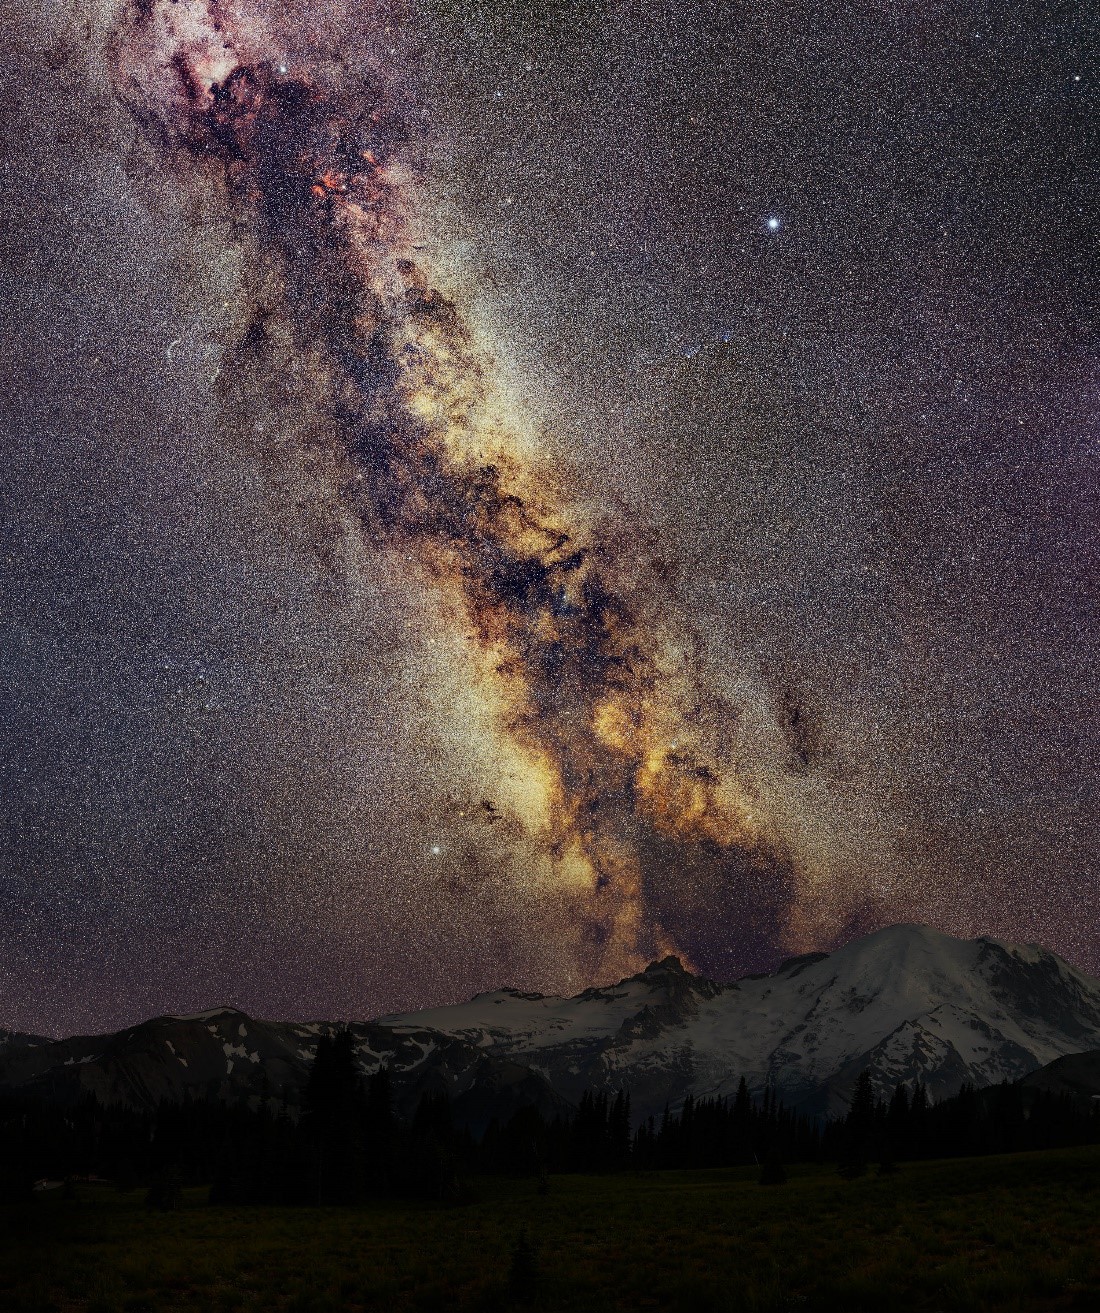
With this powerful stretching tool, the pre-shooting phase will also be affected. For modern isoless sensors, increasing the ISO does not actually improve the signal-to-noise ratio. On the contrary, it will cause some bright stars to be overexposed, losing level and color information, and appearing dead white. Therefore, it is not necessary to use ISO 12800 as the baseline for shooting stars, and the lowest ISO (or high native ISO for dual native gain sensors) can be used instead. Although the effect may not look good on the screen, after stretching in software, better level and color can be obtained than ISO 12800. For example, the following is the result of a Canon R5 + Sigma 105/1.4, full aperture, ISO 100, and 20-second exposure after stretching on a computer.
Calibration Frames
Another technique that greatly improves image quality is shooting calibration frames. The so-called calibration frames refer to bias, dark, and flat frames. The theory behind this is relatively complex, and interested students can refer to the tutorial by Kemiao (https://crazygame12345.github.io/tutorial.html). But roughly speaking, it is to cover the lens cap and take a few shots, then open the lens cap and take a few shots facing the evening sky or uniformly glowing board, and then do some mathematical processing. In this way, bad pixels can be removed, thermal noise can be reduced, and vignetting can be removed. A very important part of this process is to accurately remove the vignetting, or make the brightness of the entire surface "flat", which is the origin of the flat frame. This can allow various fine stretching algorithms to work normally. Otherwise, the brightness of the galaxy in the middle of the picture is 0.5, but it becomes 0.4 when it runs to the surroundings. This difference of 0.1 may not be obvious in the range of 0-1, but as we mentioned earlier, the typical stretching curve stretches such a small range of 0-0.02 to 0-0.95. Therefore, this difference of 0.1 will greatly limit the extent of stretching, and the specific manifestation is that the curve cannot be stretched, and it will turn black or white with a slight stretch. Therefore, the flat frame is very important and must be taken.
Telephoto Mosaics
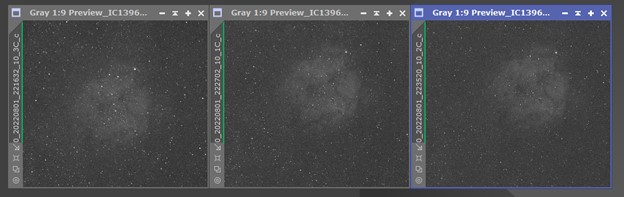
One of the challenges in astrophotography is capturing stars as pinpoint dots. Unlike telescope designs that optimize for imaging at infinity, camera lenses must also consider factors such as out-of-focus bokeh, autofocus speed, and weight. Additionally, most landscape astrophotography compositions place the foreground in the center of the frame and the stars in the corners, where they often suffer from chromatic and coma aberrations. To address this issue, many photographers stop down their lenses, resulting in lower signal-to-noise ratio in their images. However, there is a technique that can help solve this problem: telephoto mosaics. By using a lens with longer focal length to capture multiple overlapping frames of the night sky, the relative size of the stars in the final composite image is reduced, making it harder to notice any individual aberrations. This technique also allows for wider apertures to be used, increasing the signal-to-noise ratio. The difference is striking, as shown in the comparison below.
Bandwidth Shift
Many astrophotographers are familiar with the red hydrogen alpha emission nebulae in the Milky Way. These emissions are partially blocked by the UVIR filter in most cameras, but can be captured by modified cameras that remove the filter. However, there is a potential issue with narrowband filters that are designed for parallel light rays. When lenses are stopped down to wider apertures such as f/2.8, f/2, or even f/1.4, the filter's passband may shift, causing the target wavelength to fall outside the passband and reducing contrast. The solution is to use a front-mounted filter that is designed to work with diverging light rays, or to stop down the lens to a smaller aperture. This effect is demonstrated in the comparison below.
Astrophotography Cameras
For those who can afford it, the best equipment for astrophotography is a monochrome, cooled camera. These cameras have two major advantages over regular digital cameras. First, they can cool the sensor to much lower temperatures, reducing thermal noise and improving image quality, especially in hot weather. Second, they allow for more flexible imaging strategies, such as capturing luminance channels separately from RGB or narrowband channels. This allows for greater control over the final color balance and contrast in the image. However, attaching an astrophotography camera to a lens may require a custom adapter ring.
As a beginner in astrophotography, I have learned that it is important to approach each new challenge with an open mind and a willingness to learn. I hope that this post has provided some helpful insights and ideas for discussion.