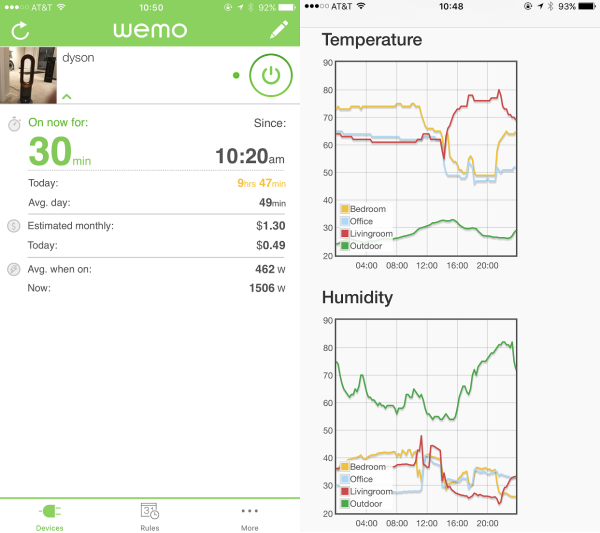
The motivation is, it's getting cold in Seattle. And the condo we live reached an extent that we cannot bear any more. In addition to buying more (and more) heaters, I also began to think about where the energy went, because our monitoring system shows that the new heaters brought 110kWh additional cost, but only improved the temperature by 2 degrees. As an engineer, the natural reaction to better understand a system is to build a visualizer/debugger and get a quantitative metric. And that's why I bought a thermal camera.
The thermal camera is much cheaper and smaller than I thought (was thinking about tens of thousands of dollars). The camera is from FLIR One. Looks like this.
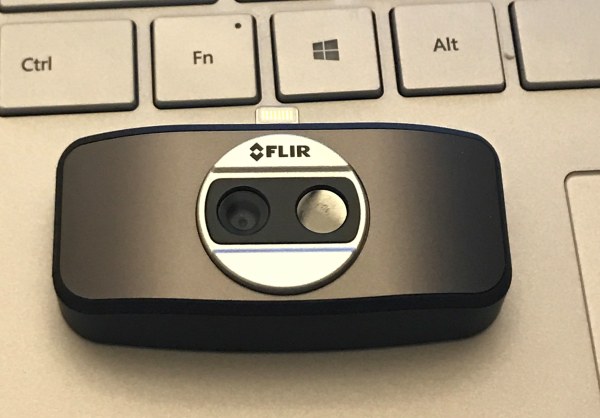
It has a lightning port, which allows it to be directly plugged into an iPhone. And there is an app giving a preview and photo snap features. The good part about the camera is, it has both a optical camera and an IR camera. Compared to the regular thermal cameras which show the IR images only, this camera helps you to better identify the bottleneck by showing the IR image overlaid on the optical image. After getting the camera from Amazon, I snapped a few photos and found some problems of my home soon.
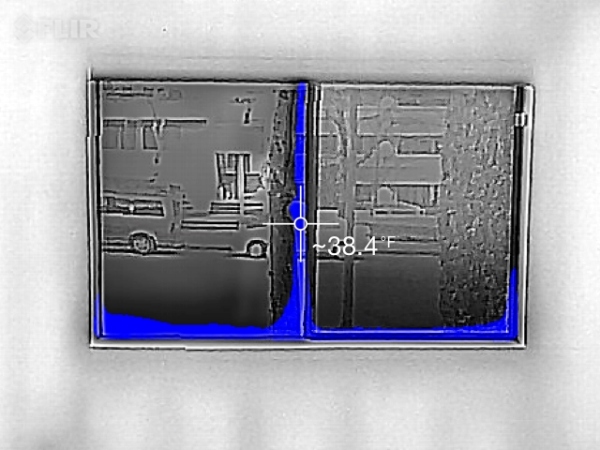
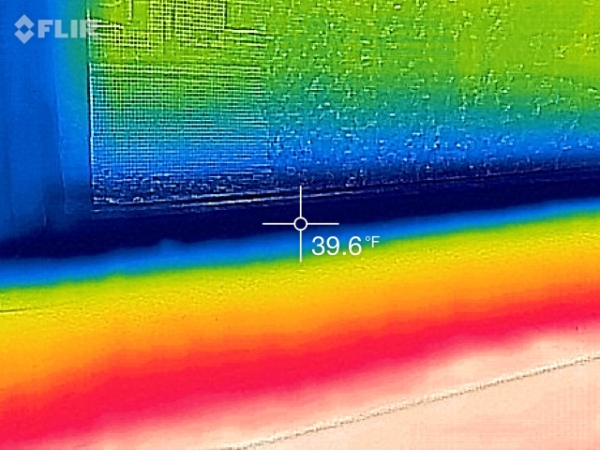
First, the air leak of the windows is really a serious problem, especially the lower part. If we take a closer look, it's easy to figure out my previous idea to caulk the gap between the aluminum body and the wall is totally wrong. After applying silicone caulk, the energy leak happens more in the gap between the window body and the track, instead between the body and the wall. This is where weatherstrips would be useful.
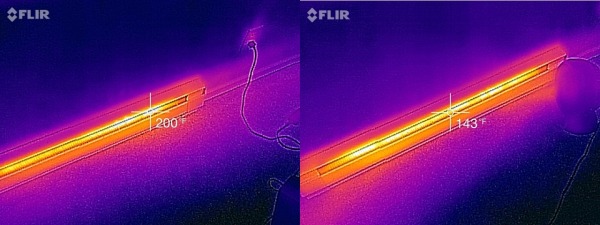
The second improvement was, our old condo still used baseboard heaters, which relies on radiation to make the entire room warm. I bought a small fan to further introduce convection to improve the thermal efficiency. However, the thermal camera found that even with the fan, some area of the heater was still in high temperature (200 degrees). We took a closer look at the fan, and figured out that's because it blows air out in an asymmetric way (most of the air going off the heater). After turning it around, the temperature of the fins were greatly reduced, and we also observe a steeper temperature curve after turning on the heating.
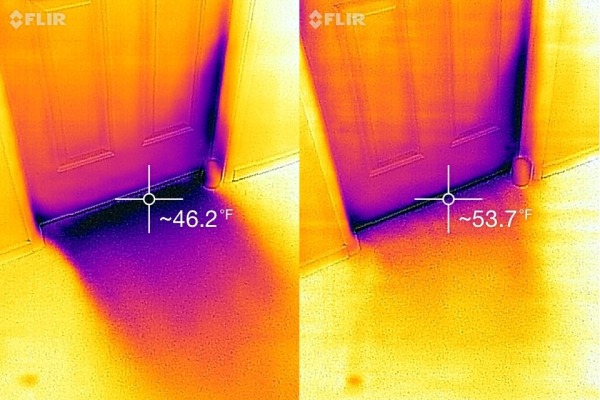
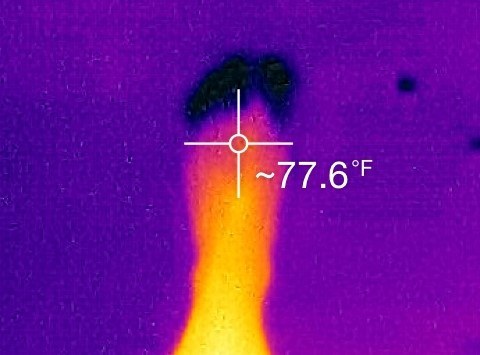
The third observation is, we found another important source of the heat loss is the room door! Below is the IR photo of the door. It's not hard to see the cold wind is blowing inside (left)... We used some weatherstrips to block the air flow, and it worked pretty well.
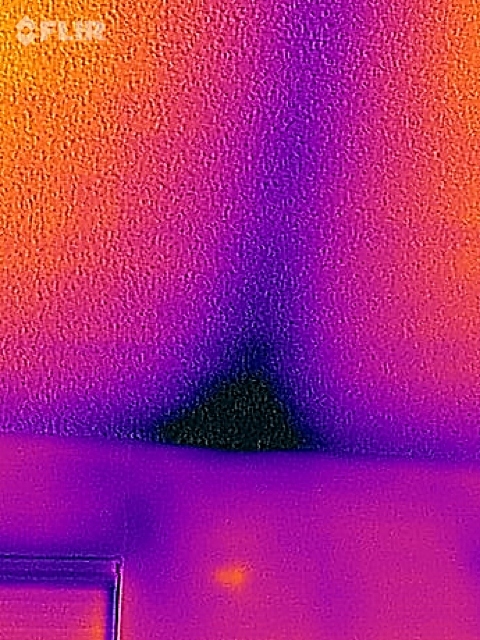
There are also a lot of fun applications of the thermal camera. For example, we found there was a low-temperature strip on our bedroom ceiling. After some investigation, we found this is the air duct connecting the outside and the bathroom. And the low-temperature area is from the cold outside air.
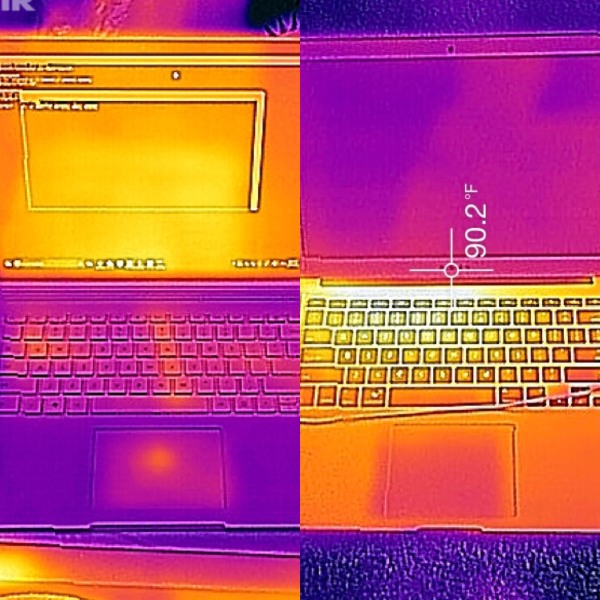
It's also interesting to point the camera to daily objects, for example, a Macbook and a Surfacebook. You can see that the Macbook mounts its CPU on the base, but the Surfacebook mounts that behind the screen. You can even see what keys I touched before taking this photo. Looks it's not impossible to steal passwords with a thermal camera.
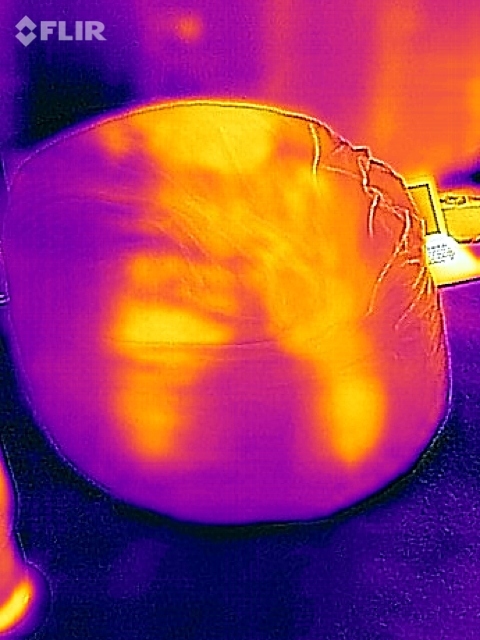
Pointing it to a beanbag, you can see how the last person sat on it:
You can also point it to human body of course. This photo really scared me. While I don't feel especially cold on the toes, the photo shows they are even cooler than the floor. A good use of this is possibly to identify plastic surgeries... One possibly had plastic surgeries before if his/her nose is much cooler than the face...
In summary, thermal cameras are fun. They give us a quantitative metric to do optimization and evaluation. It's a thumb rule to have a measurable and quantifiable metric before doing any optimization. Otherwise, one might feel busy, fulfilled, and even accomplished, while bringing no real changes.
Comments